
This blog describes how to configure an base image, based on RHEL7 (in my case RHEL 7.5).
Because there aren’t many blogs about RHEL7 with Horizon Instant-Clones, I will try to guide you through the steps. Bare in mind, I am not an Linux specialist but I now the basics. Before we begin let me give some information about the infrastructure:
- Horizon 7.8 Instant-Clones only
- vSphere 6.7u2
- Red Hat Enterprise Linux (RHEL) 7.5
- Microsoft Active Directory forest and functional level on 2016
Many of the steps of the installation and configuration of an RHEL 7 VM are not written in the VMware documentation. Especially when it comes to joining the Active Directory.
In our case we cant use “winbind”, “openldap” or PowerBroker Identity Services (PBISO) to join the domain. So we used “adcli” and “realm”.
To get to the official VMware documentation use the following link:
https://docs.vmware.com/en/VMware-Horizon-7/7.8/linux-desktops-setup/GUID-E6825232-3188-4507-B757-0CF743047282.html
Enough information, let’s start with building the Template!
Building the Template VM
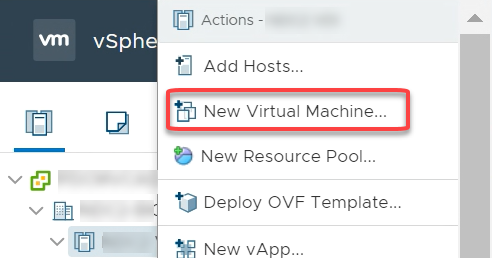
Logon to you vCenter select your cluster and choose “New Virtual Machine”.
Creation Type
Logon to you vCenter and “Create a new Virtual Machine” .

Name and Location
Give the Virtual machine a name, and select the location where the VM needs to be placed.

Compute Resource
Select the compute resources where the Template VM can be placed.

Storage
Select the Storage on where the VM can be placed.

Compatibility
Select the right compatibility.
We have chosen to use the “ESXi 6.7 and later” option for Hardware Layer 14.

Guest OS
Select the right Guest OS for your Red Hat installation.

Virtual Hardware
Customize the hardware to the customer needs.
In our case we added an extra vCPU, extended the memory to 4GB and hard disk to 50GB.

VM Options
Open the second tab “VM Options”.
Select “Boot Options” and enable “Force Bios setup“.
With this option enabled, you get straight into the BIOS of the VM after powering it on.
Other options within the “VM Options” tab will be described after the creation of the VM.

Complete
Check the installation summary and finish.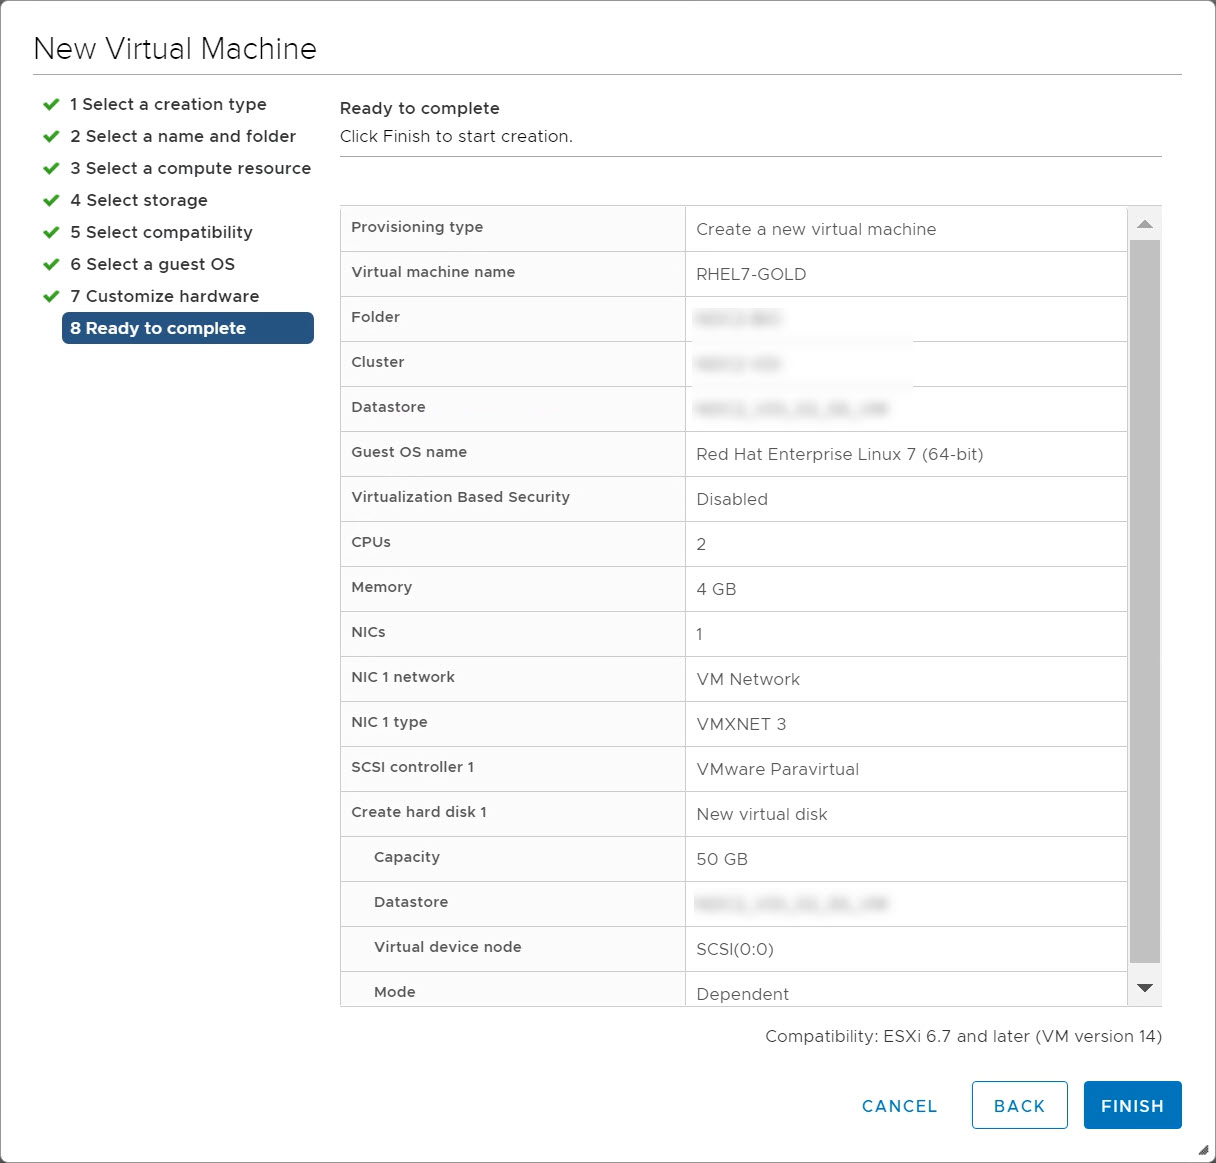
Configure VM
Now that the VM is created we first need to add and change some settings.
Select the VM from vCenter and select “Edit Settings”.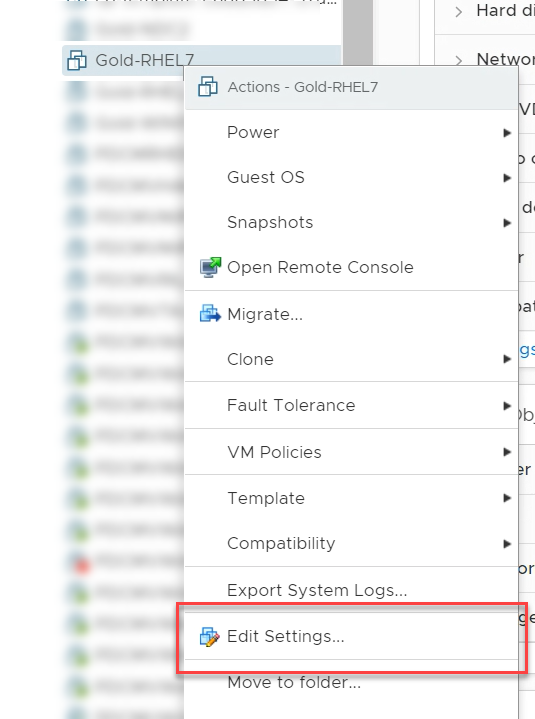
Virtual Hardware
Select the right Network Label for the Network adapter and check the “Connect” box.
Select the “Datastore ISO File” and browse to the RHEL7 installation software.
Check the “Connect” box and go to the second tab “VM Options”.
Select the “Video card” memory that is necessary for the amount of displays (and resolution) from witch the employees are connection with the Horizon Client or HTML5. This need to be set in the Template VM. Horizon isn’t capable yet of placing these settings from the pool level, like with Windows 10.
Use the following link as a reference to determine how much memory is needed:
https://docs.vmware.com/en/VMware-Horizon-7/7.8/linux-desktops-setup/GUID-174C9A8E-8718-4479-B3D9-E7EF9536B1F2.html?hWord=N4IghgNiBcIEwAYAsAOAHgRgKwGYBsIAvkA
vGPU
Side note:
If you want best of both worlds with vGPU powered RHEL7 desktops. Than you need to stick to dedicated desktops on RHEL7. The combination of vGPU and Instant-Clones with RHEL7 is not supported (yet). If you want to use the dedicated desktops, bare in mind that you need to make changes in both the VM hardware and in the Guest OS.
The link above (VMware documentation) will give you all the help that you need in configuring this.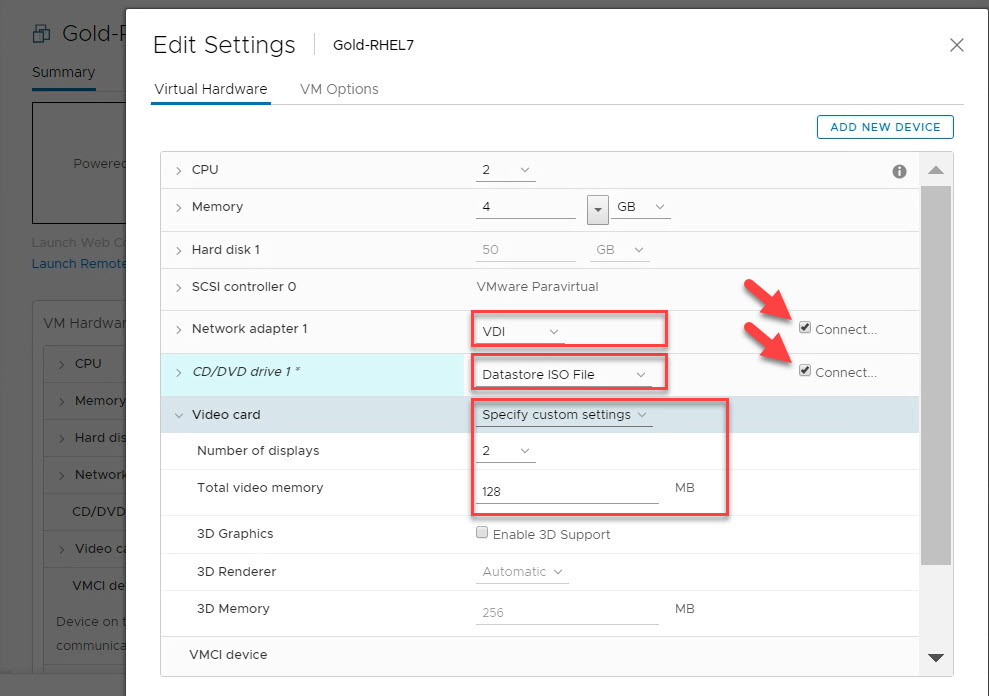
VM Options
In the VM Options uncheck the “Enable Logging” option. We are going to use Instant-Clones so the logfiles keep getting deleted after an logoff. It has no purpose in our case.
Select “Edit Configuration” to edit the advanced settings.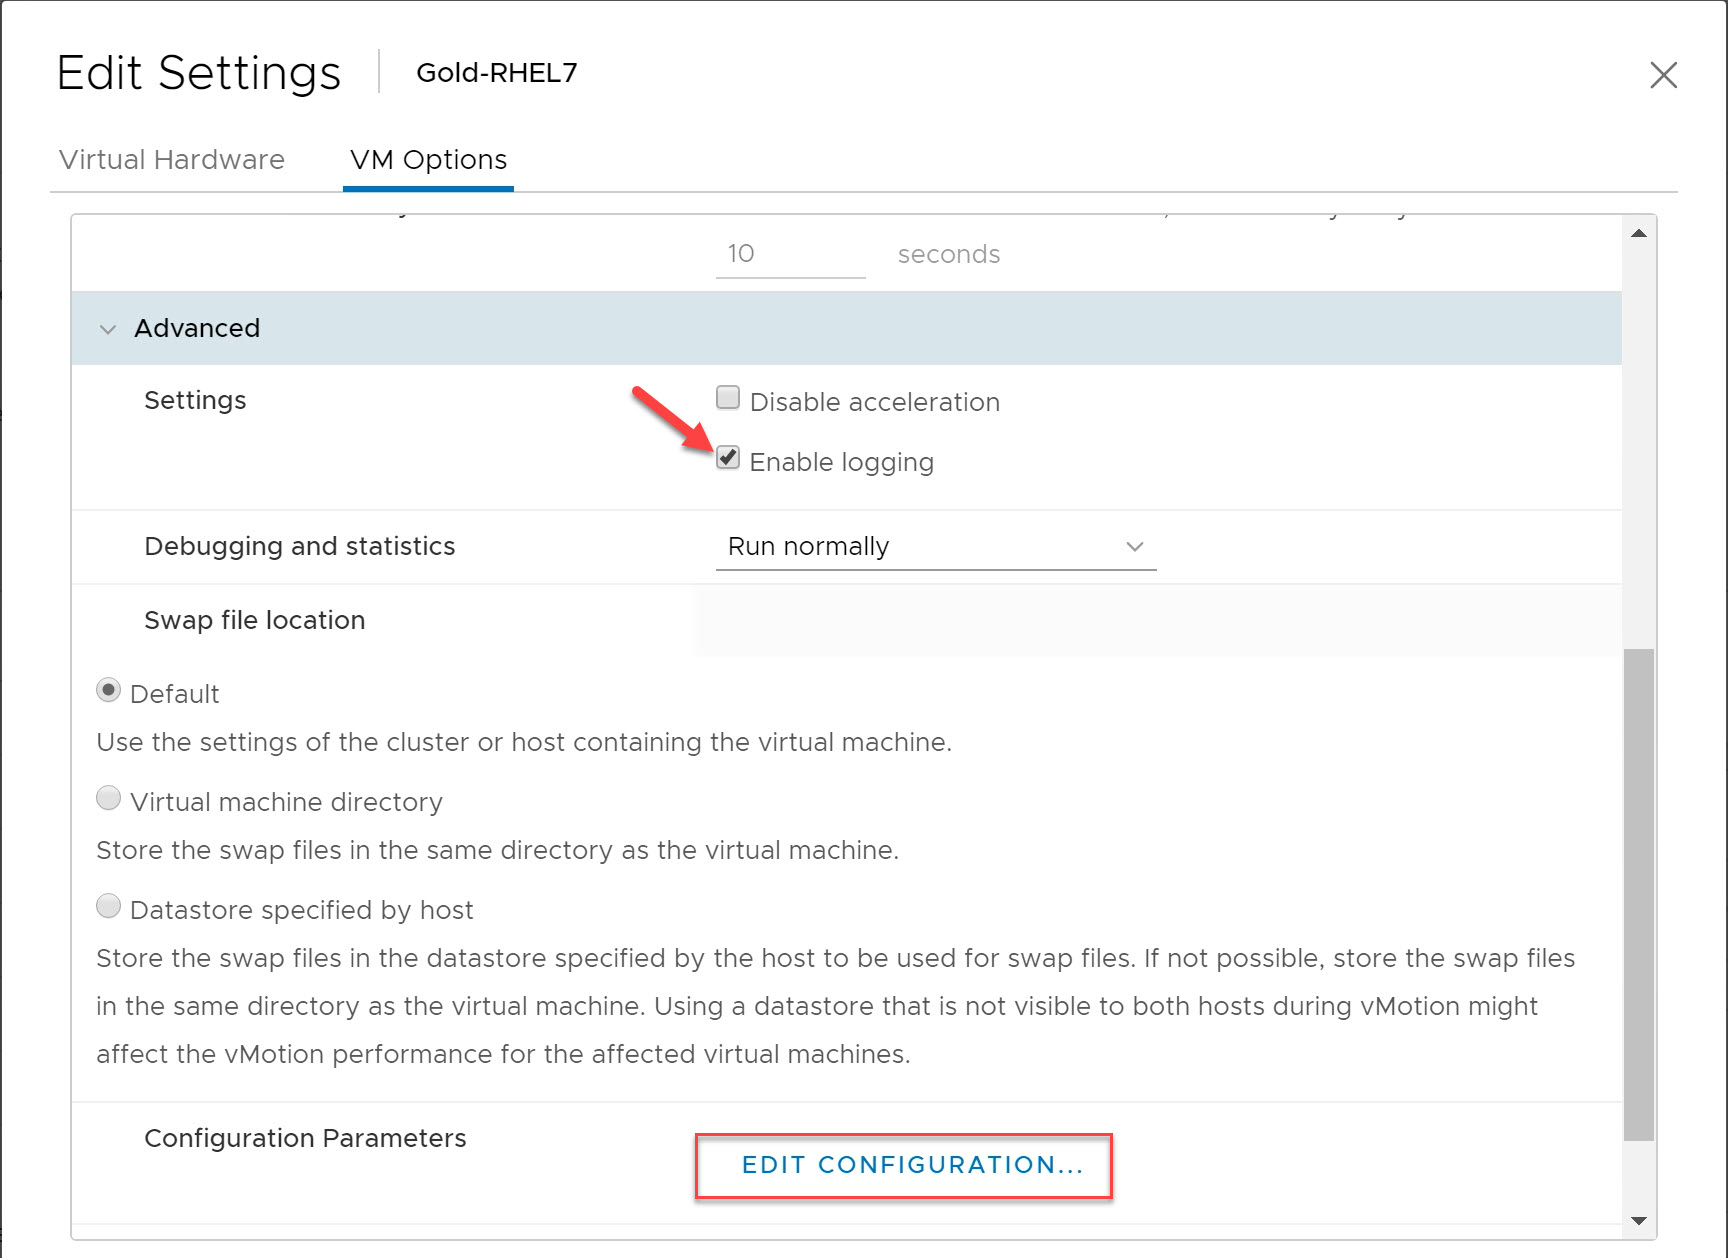
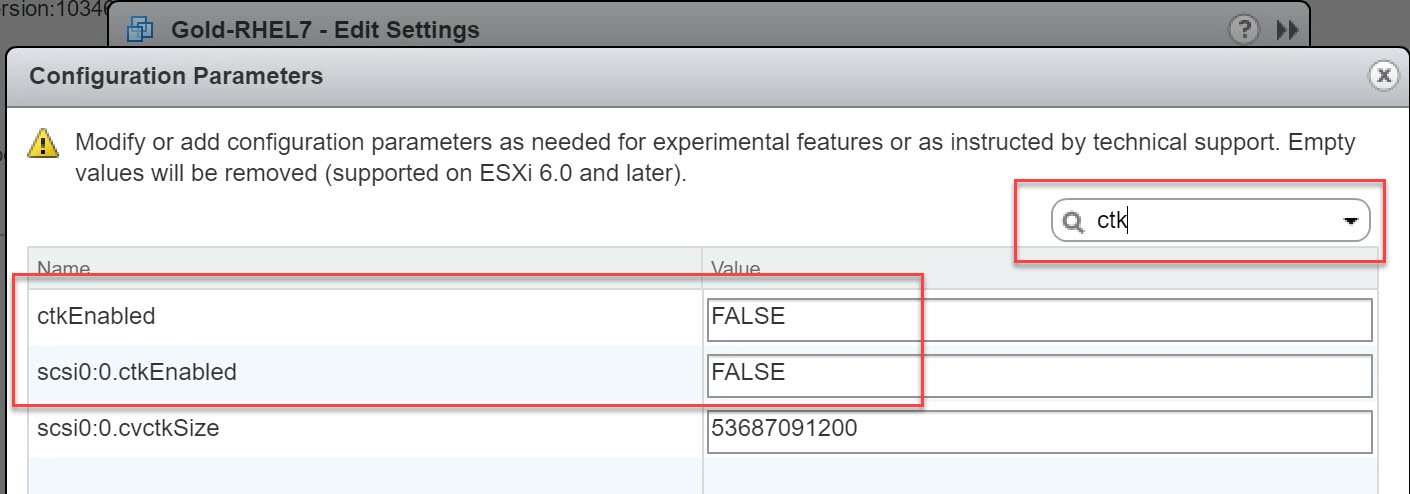
Advanced Settings
During the provisioning we encountered errors related to Change Block Tracking (CBT).
The following VMware KB-article describes the Solution to this:
https://kb.vmware.com/s/article/1020128
Besides of the issues with CBT, the last lines of the document state the following:
“If you are using VMware Horizon View and linked clone or instant clone virtual machines, you should not be using CBT. Always ensure that CBT is disabled for the parent virtual machine.”
For Disabling CBT on the Template edit the following lines to False:
- ctkEnabled = FALSE
- scsi0:0.ctkEnabled = FALSE
Side Note: With Windows 10 desktops I normally add the following line:
We skipped this one, because it’s not related to an RHEL 7 Guest OS.
devices.hotplug = FALSE
Power on
Save the configuration and “Power on” the VM.
Almost immediately you see the BIOS screen popping up.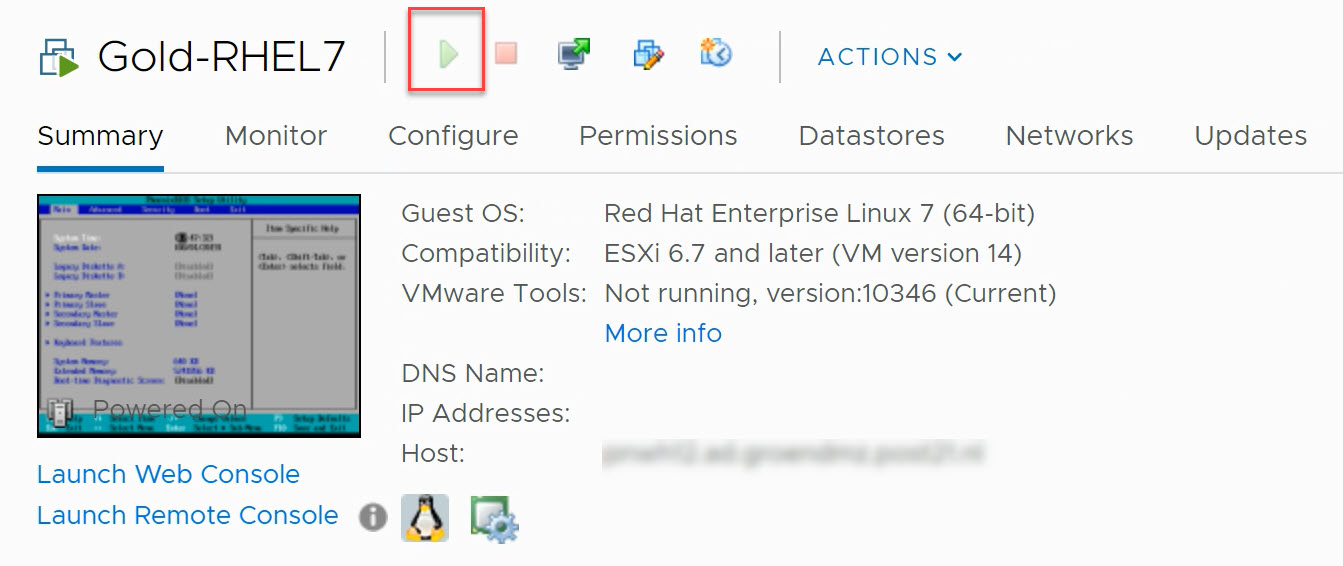
BIOS
Launch the Web or Remote Console.
The main thing within the BIOS is that we disable all settings that we do not need. The VM will benefit from it. In the “Main” tab all Diskette stations are disabled, that’s fine.
Open the “Advanced” tab.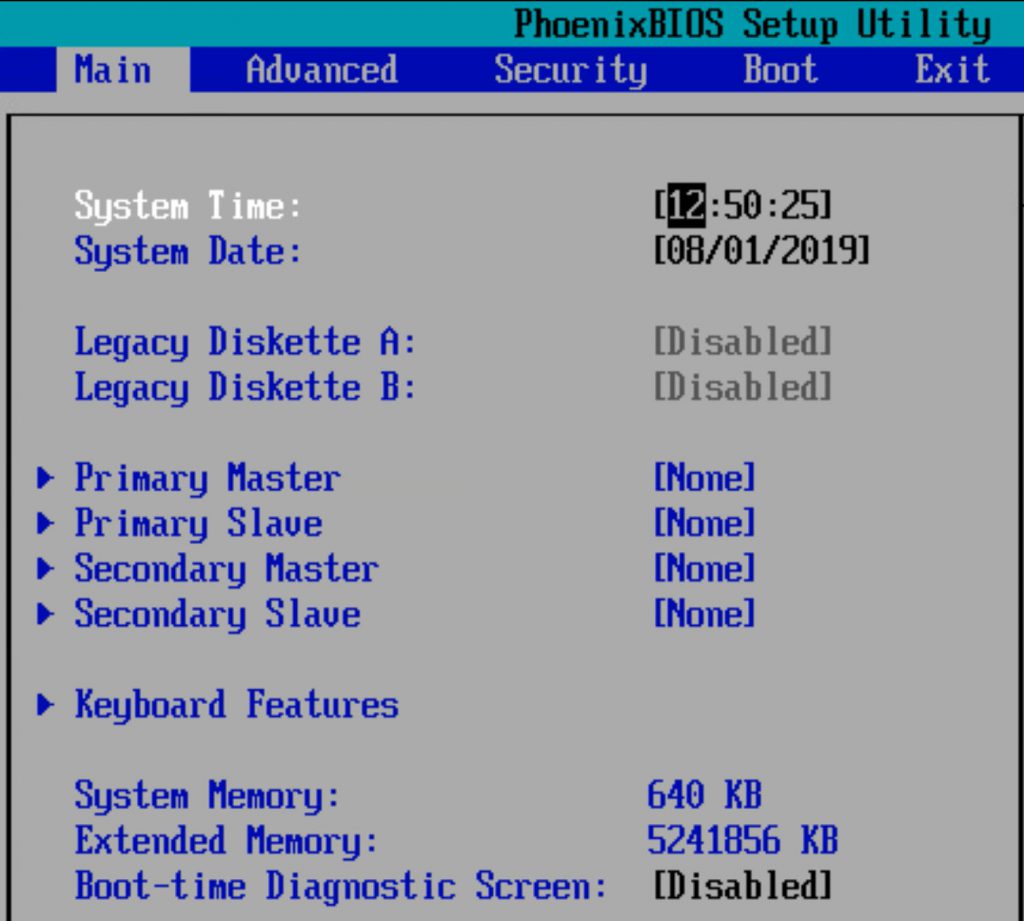
Advanced
Within the advanced section, select “I/O Device Configuration”.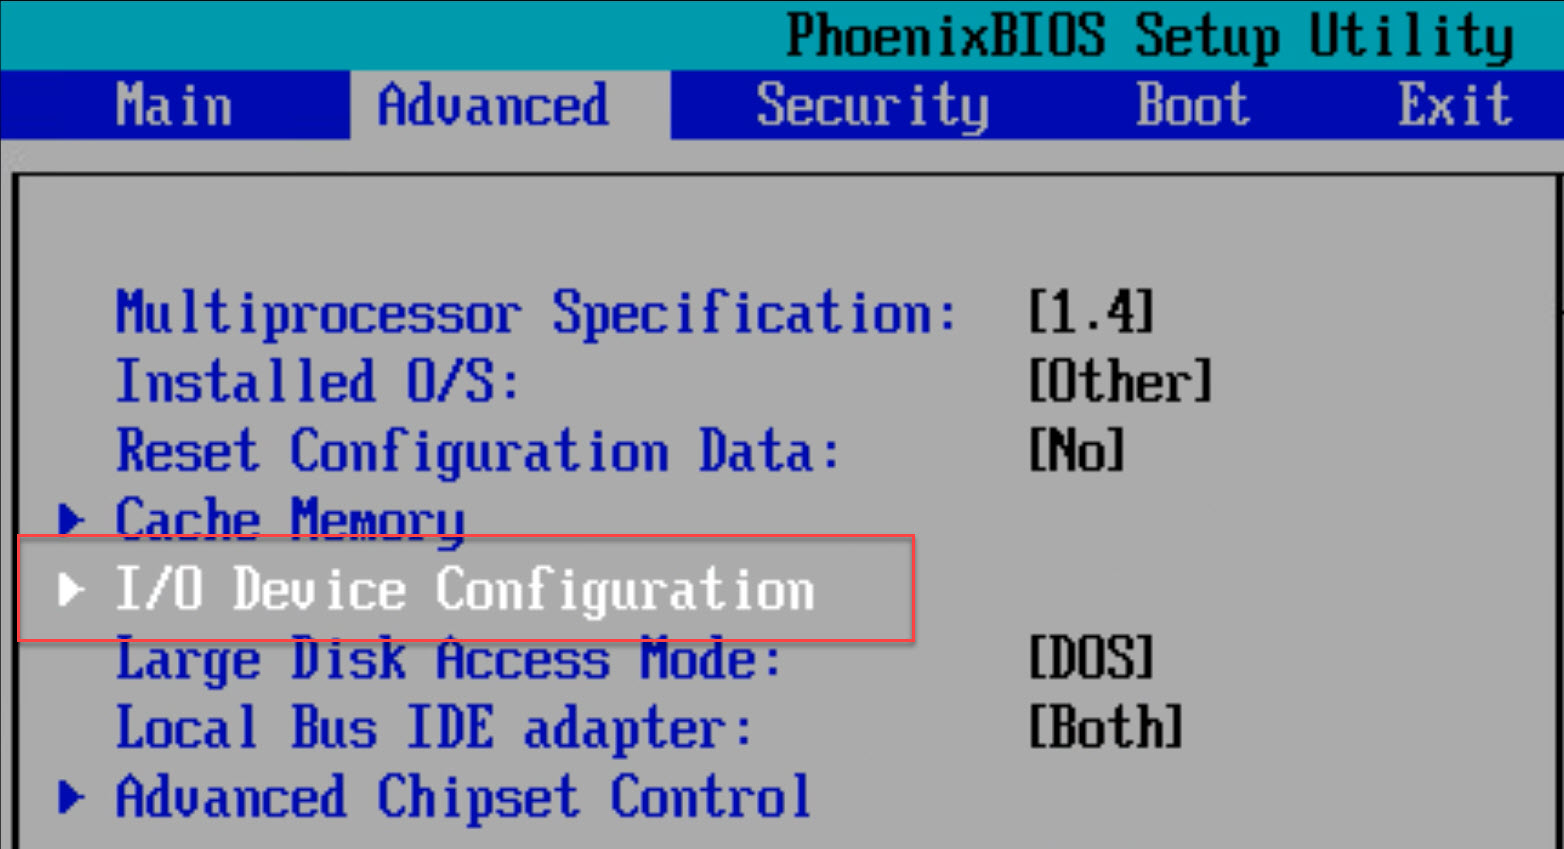
I/O Device Configuration
We don’t need any of the I/O Devices, so we disabled them all.
Press the Escape button to return to the BIOS main screen.
Select “Boot”.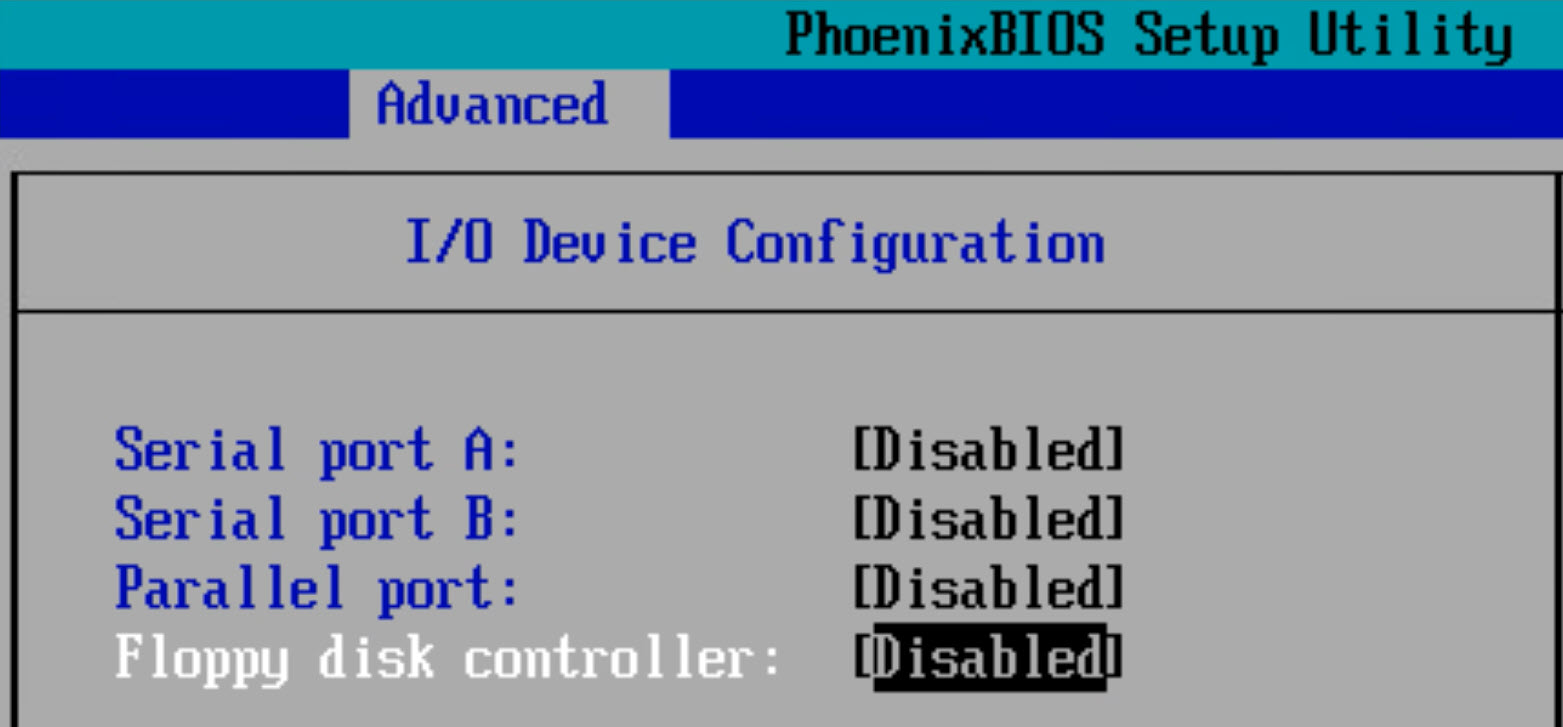
Boot
If you would like to change the boot order than you can configure this.
We didn’t make changes to the default settings.
Press Escape to get to the main screen.
Select “Exit”.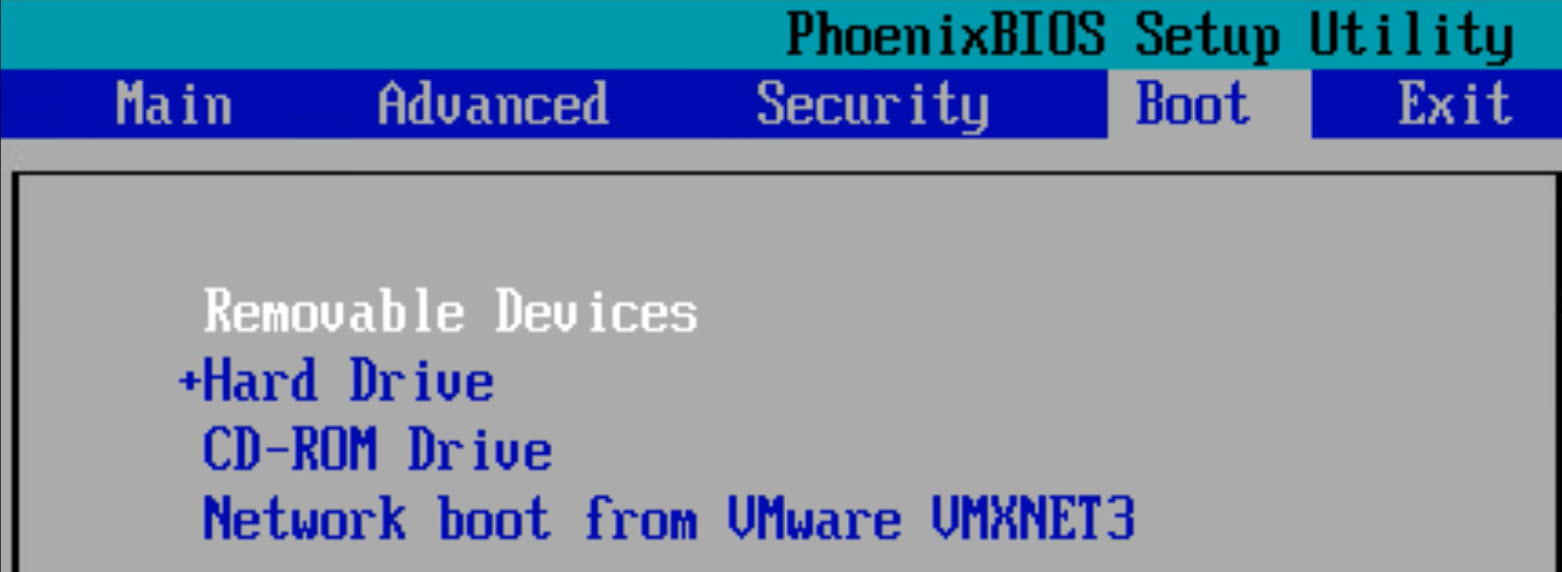
Exit BIOS
If you are happy with the settings, then save them by selecting “Exit Saving Changes”.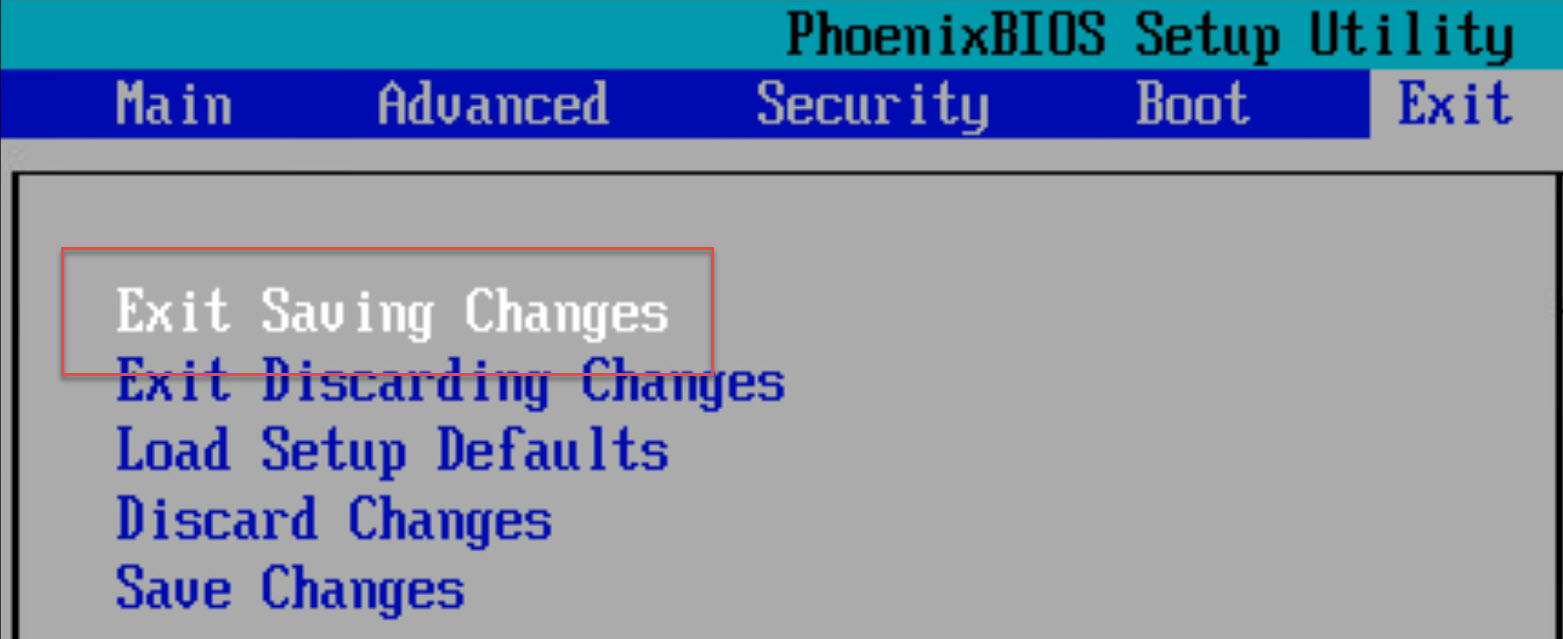
Installing Red Hat Enterprise for Linux 7.5
After customizing the VM virtual hardware and BIOS it’s now time to install the RHEL7 software.
The ISO with the software is already attached to the VM and “Connected”.
The installation screen from RHEL7 is being shown.
Language
Select your preferred Language.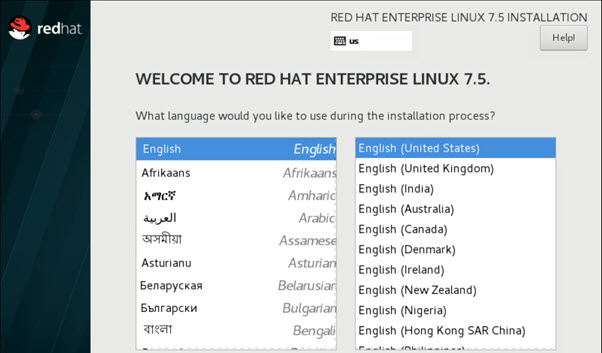
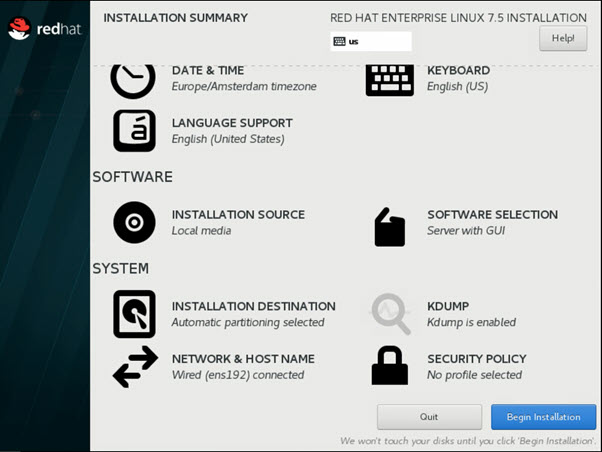
Installation Summary
The installation summary shows al the aspects that you can configure before the installation starts. We didn’t make any adjustments to the Security Policy, all other options we configured.
Start with the “Network and Host Name” configuration. If you don’t start with the network you cannot select your NTP-servers.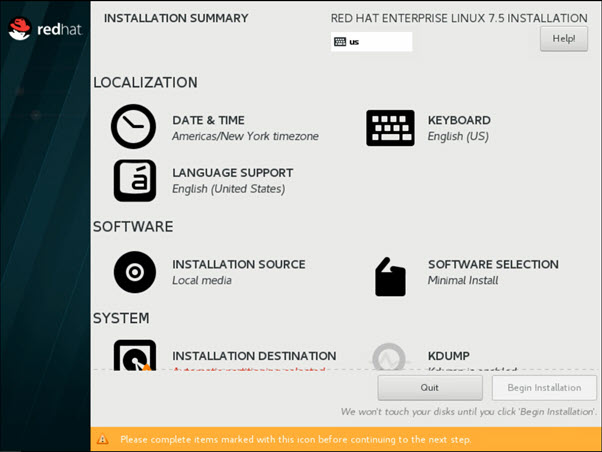
Network & Hostname
Enable the Ethernet Adapter by switching the toggle from off to on.
Change the Host Name to the desired name. Select “Configure” to open the advanced settings.
Nework General
In the network configuration enable “Automatically connect to this network when it is available”.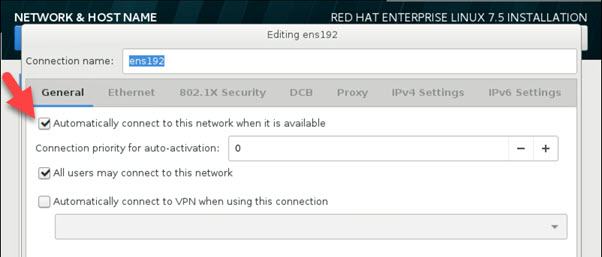
IPv6
Select IPv6 Settings, and select “Ignore” as the Method.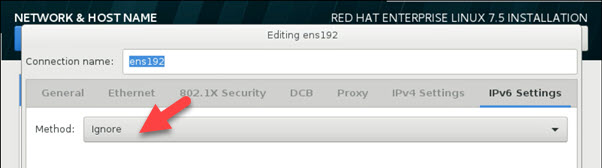
Date & Time
You can set the Date & Time by choosing an Region or you can configure NTP.
I prefer to enable NTP. Disable all NTP Host names which aren’t available.
If the NTP source isn’t available it will show the hold icon, so be sure that the NTP source is reachable.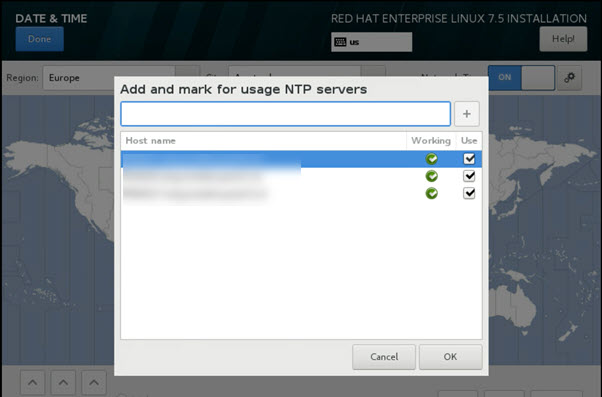
Keyboard
Choose your Keyboard Layout.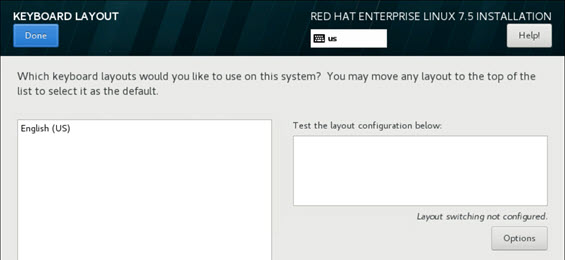
Language Support
Select if you need any extra languages in the Guest OS.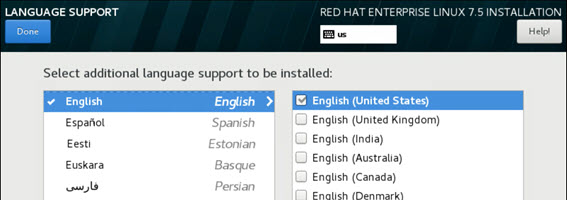
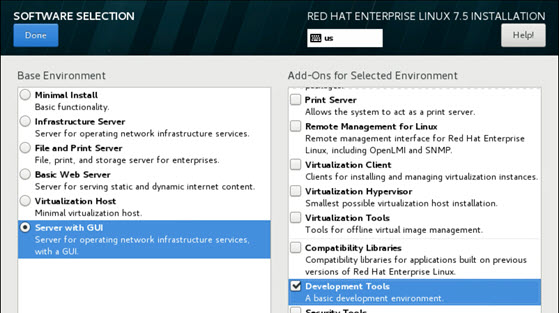
Software Selections
Our business case described that the users need too have the following Add-ons:
- Server with GUI
- Network File Systems Client
- Development Tools

Installation Destination
Because we have only one vDisk attached, select the “VMware Virtual disk” followed by done.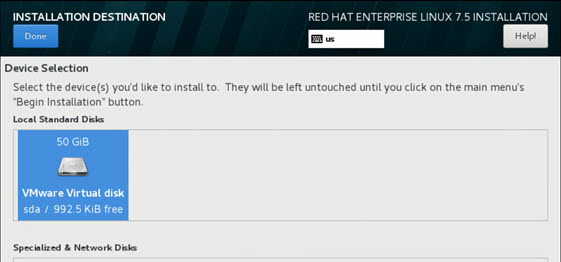
Begin the Installation
Now we are done with the configuration press “Begin Install”.
The configuration screen appears were you can set the “Root password”.
If you quickly set the root password all is fine, but if you wait an minute for doing this the screen may freeze. This is because of the installation which is running in the background. Be patient and after a few minutes the freeze is gone and you can set the password.
If the installation is finished you see “Complete!”.
Reboot the VM.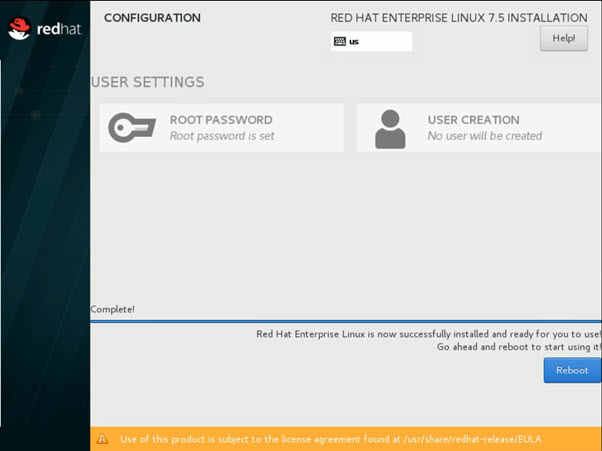
Licensing
After the reboot you need to accept the EULA.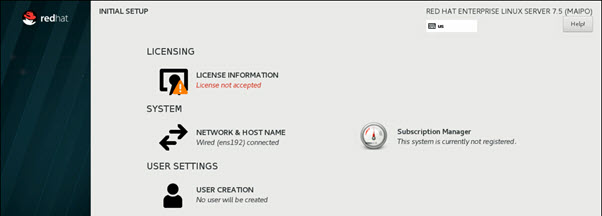
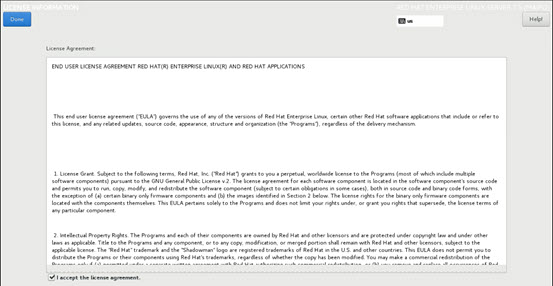
After accepting the EULA agreement the “warning” is gone and you can finish the configuration.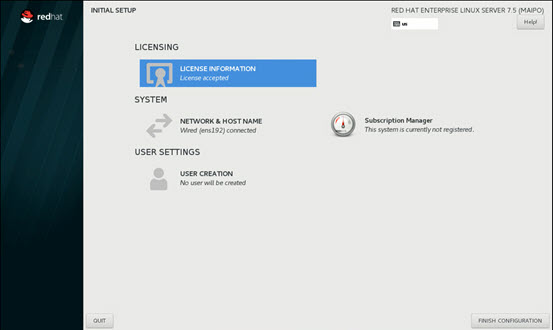
Logon to the VM
With the first logon you get some first run screens were you need to set user specific settings.
Set your preferred Language.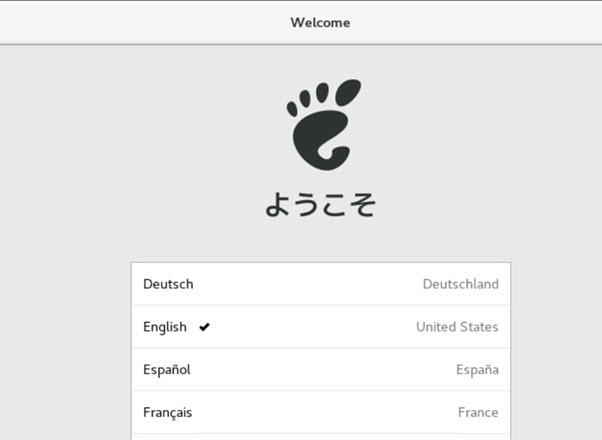
Keyboard Layout
Choose your keyboard layout.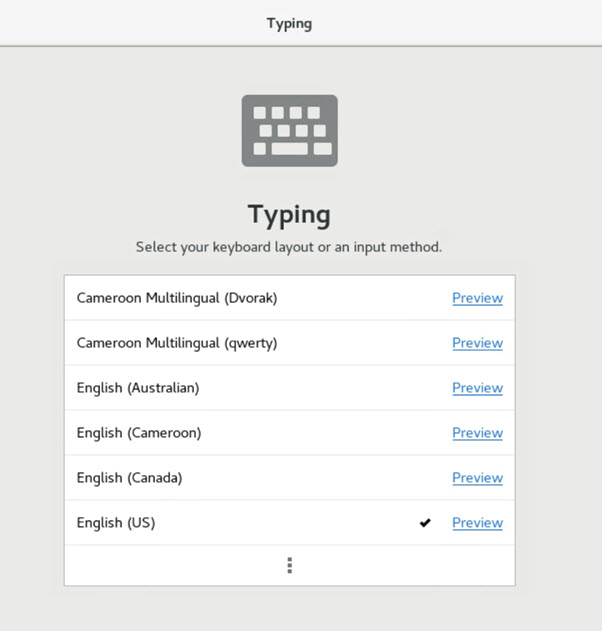
Privacy
Disable the slider to “Off” if you don’t want applications to determine you geographical location.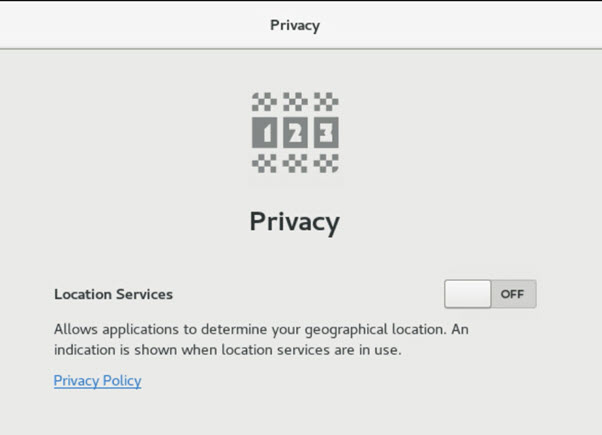
Time Zone
Choose the correct Time Zone.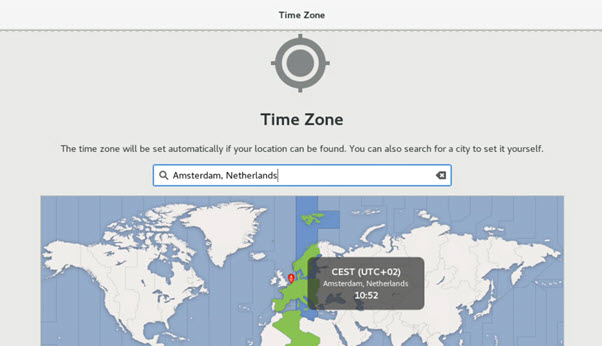
Online Accounts
We do not want to connect any “online accounts”, select Skip.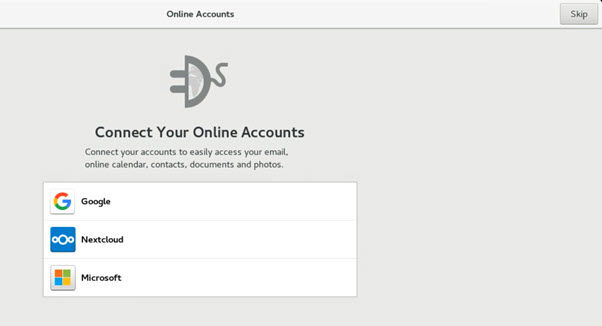
About You
Because we are not using any type of Enterprise Authentication for Red Hat we have to create an extra account. We named it “admin” and gave it an password.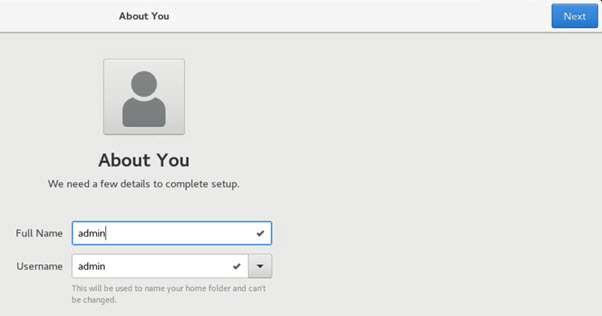
Finish
So finally we get to the point ware we can do some fun stuff.
Start using the Red Hat Enterprise Linux Server.
To Do
So what are we going to add and change to the Template VM:
- Replace the open source VMware Tools by the VMware Tools
- Create the repository so we can install features
- Install the Horizon Agent
- Configure the Horizon Agent
- Join the Domain
To be clear: all commands from the Terminal are executed with Root rights!
SMB Software
First we need to copy the installation software to the VM.
We have the ability to connect to an SMB-share, where we already downloaded both VMware Tools as the Horizon Agent software.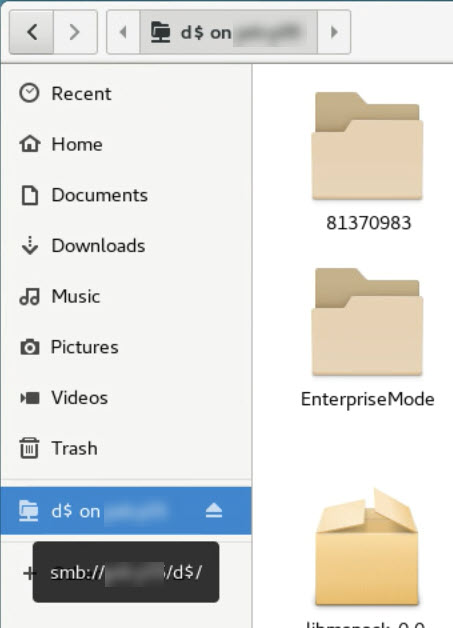
Copy Software
Create an temporary folder on the system where the software can be placed.
We created the “_Install” directory within the “tmp” directory.
From the SMB-share we copied the software to “_Install” directory.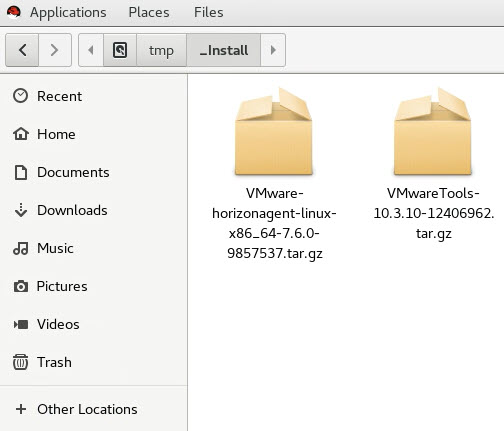
Remove Open-source VMTools
First to make some things clear. Why are we replacing the built-in open- source vm-tools by the VMware Tools?
- First of all the new version of the VMware Tools 10.3.10 (vSphere 6.7u2) instead of 10.1.10 (vSphere 6.0u3).
- In the GitHub there are new open-source vmtools also based on version 10.3.10.
But the release notes states things about freezes and Horizon issues.
Because it’s an production VM, I avoid any risk of instability. But that’s just me.
VMware recommends to use the open-source vmtools, but the VMware Tools are also supported. You can download the open-source vmtools from the following link:
https://github.com/vmware/open-vm-tools
- In the GitHub there are new open-source vmtools also based on version 10.3.10.
- Be compliant with the other VMware Tools versions on the other virtual desktops in the Cluster.
Open the “Terminal” and switch to the Root account.
su- root
Remove the open-source VMTools.
yum remove open-vm-tools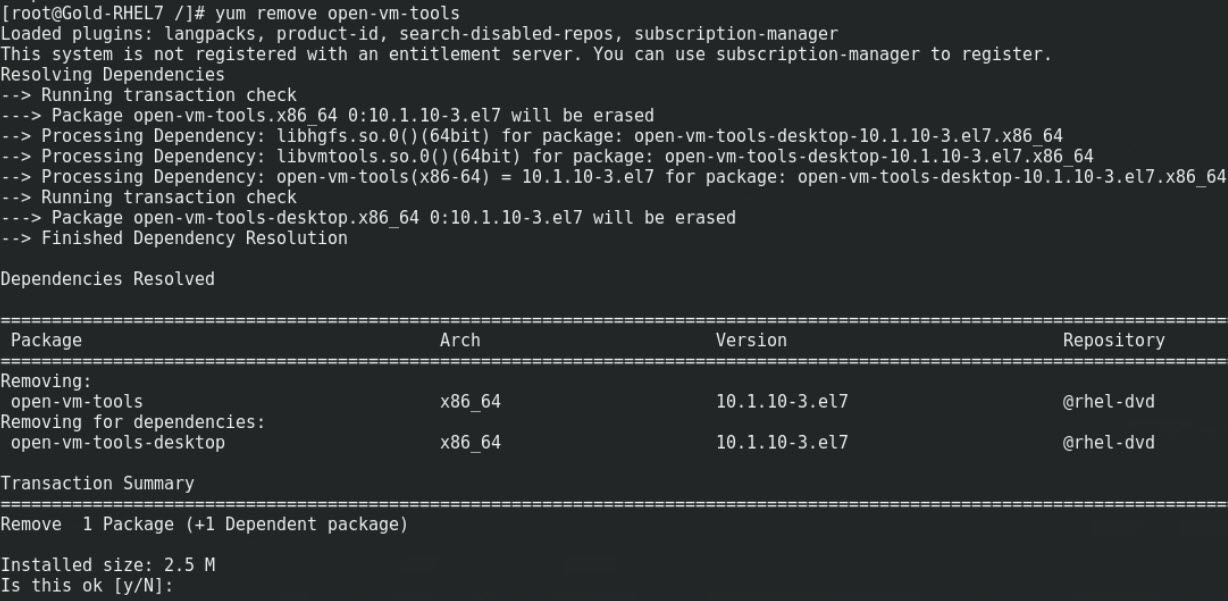
Check if the open-source VMware Tools are successfully removed.
Reboot the VM.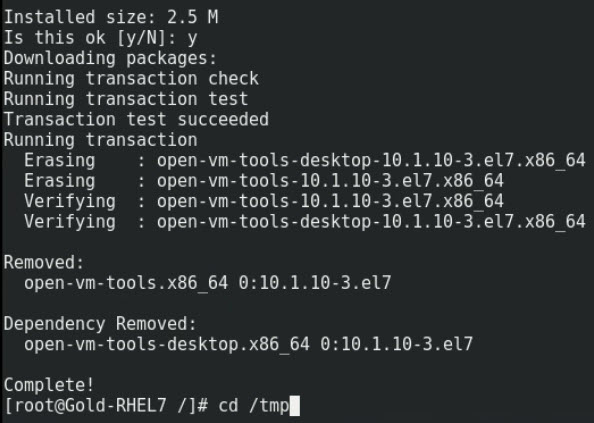
Install VMware Tools
After the reboot, we first need to extract the VMware Tools installation software so that we can install it.
The order of extracting the installation software:
- Extract the installation software
Go to the folder where the installation software is.
cd /tmp/_Install/VMWARE\ Tools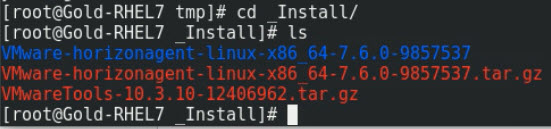
- In the VMware Tools folder we need extract the software from the tar.gz file with the following command:
tar zxvf VMwareTools-10.3.10-12406962.tar.gz After the extraction of the tar.gz file the following folder with files is created.
ls - Open the folder location:
cd VMware-tools-distrib/
- VMware recommends installing another version of the open-source vmtools.
Install the VMware Tools with the following command:
./vmware-install.pl
- Check if the VMware Tools are running.
systemctl status VMware-tools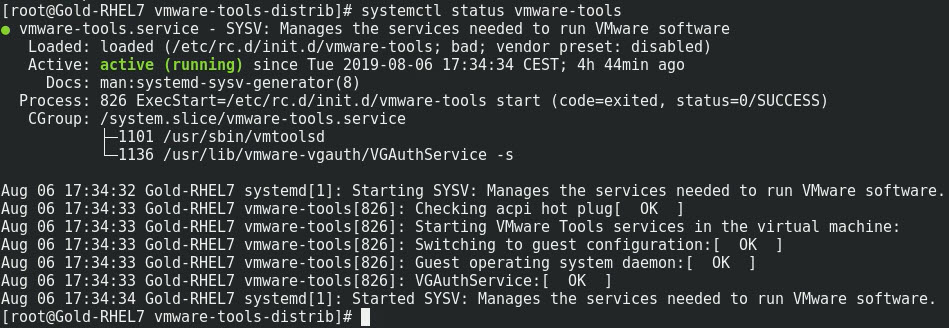
- Reboot the VM.
reboot
The difference
Wat is visable changed in the Template VM within vCenter.
The VM with the old VMware Tools: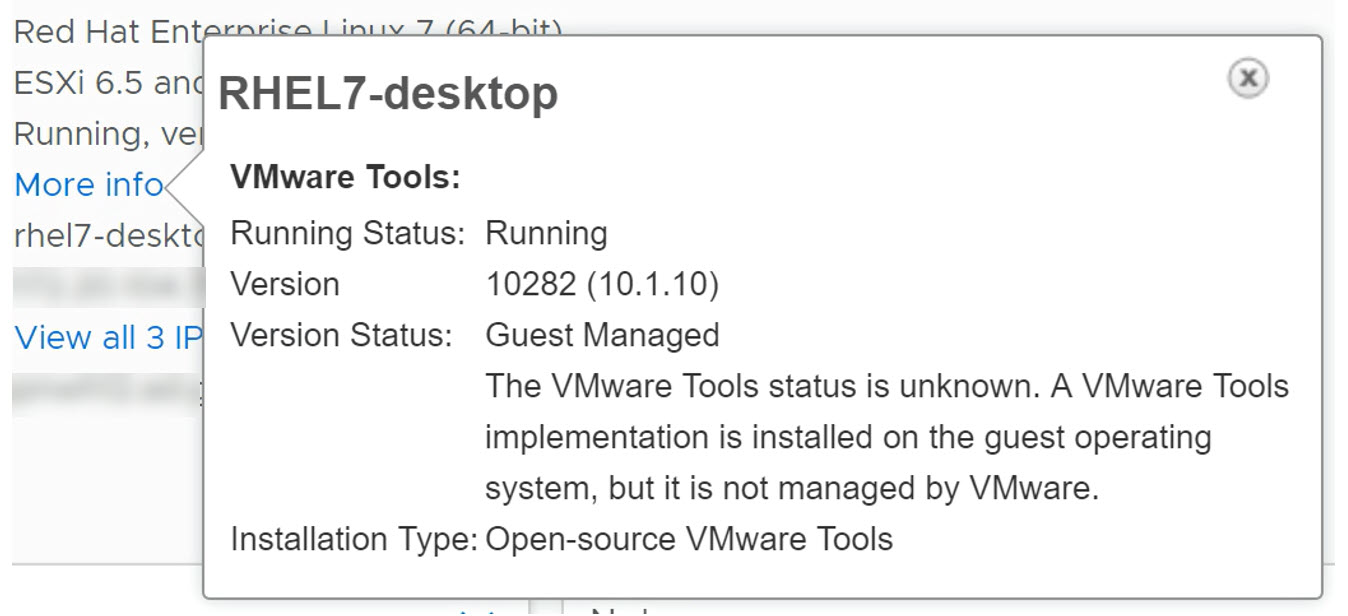 Is now replaced by the new VMware Tools:
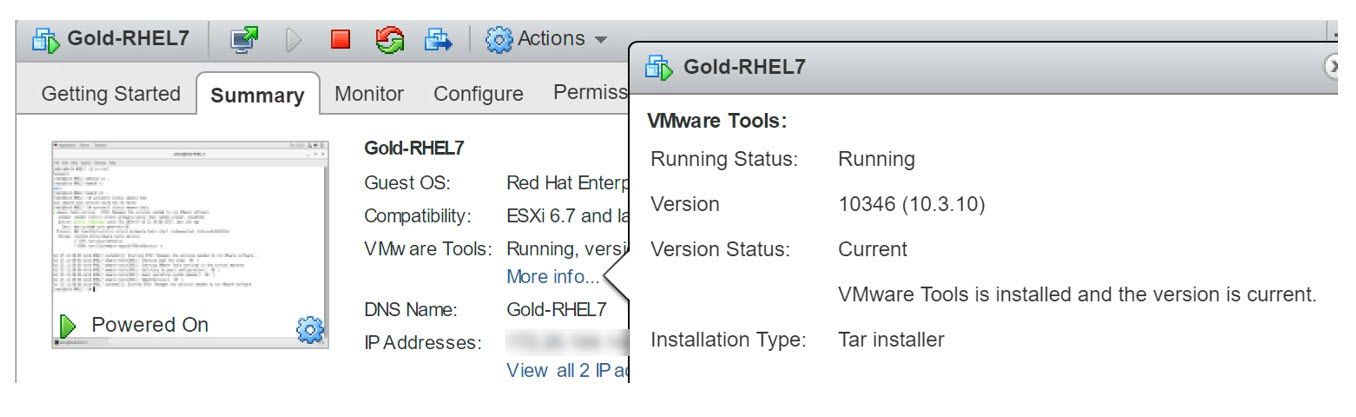
Runlevel
Now that we changed the VMware Tools version, we can build further on the VM.
Check if the default runlevel is on 5 (graphical.target).
systemctl get-default The table below describes the different runlevel and targets.
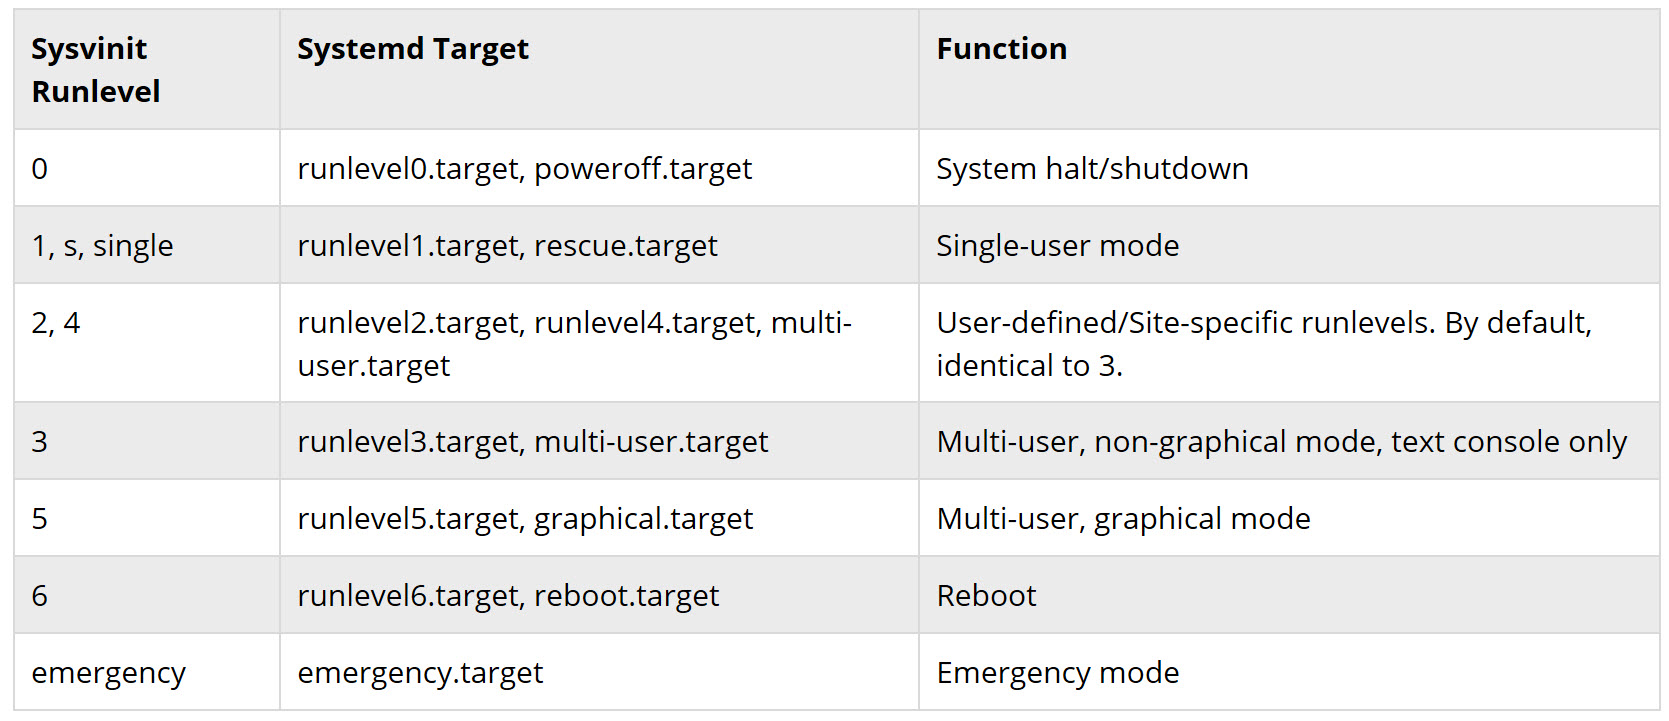
Disable libvird service
Within RHEL7 there is an extra interface created with the name “virbr0”.
We don’t want to use this interface so we will disable it.
Use the following command:
systemctl disable libvirtd.service Check if the libvirtd.service service is disabled.
systemclt status libvirtd.service
Connect the Repository
The repository which needs to be mounted is the RHEL7 installation DVD.
Create the mountpoint:
mkdir /mnt/rhel-dvd && mount -t iso9660 -o ro /dev/cdrom /mnt/rhel-dvd![]() Touch
Touch
Touch the file with the command:
touch /etc/yum.repos.d/rhel-dvd.repo![]() Go to the repository location.
Go to the repository location.
cd /etc/yum.repos.d![]() Within the repository folder you now must edit the rhel-dvd.repo file.
Within the repository folder you now must edit the rhel-dvd.repo file.
vi /rhel-dvd.repo![]() Within the VI editor you need to change the configuration to match the following lines.
Within the VI editor you need to change the configuration to match the following lines.
[rhel-dvd]
name=Red Hat Enterprise Linux $releasever – $basearch – DVD
baseurl=file:///mnt/rhel-dvd/
enabled=1
gpcheck=0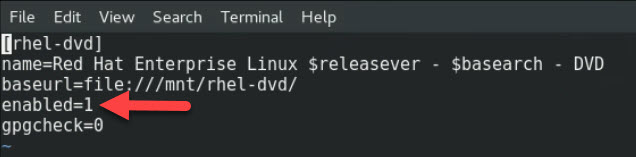 After editing the file save and close it with the commands:
Escape, followed by “:wq!”.
Installation of the extra services from the repository
yum install libappindicator-gtk3 glibc adcli sssd authconfig samba-common-tools krb5-workstation realmd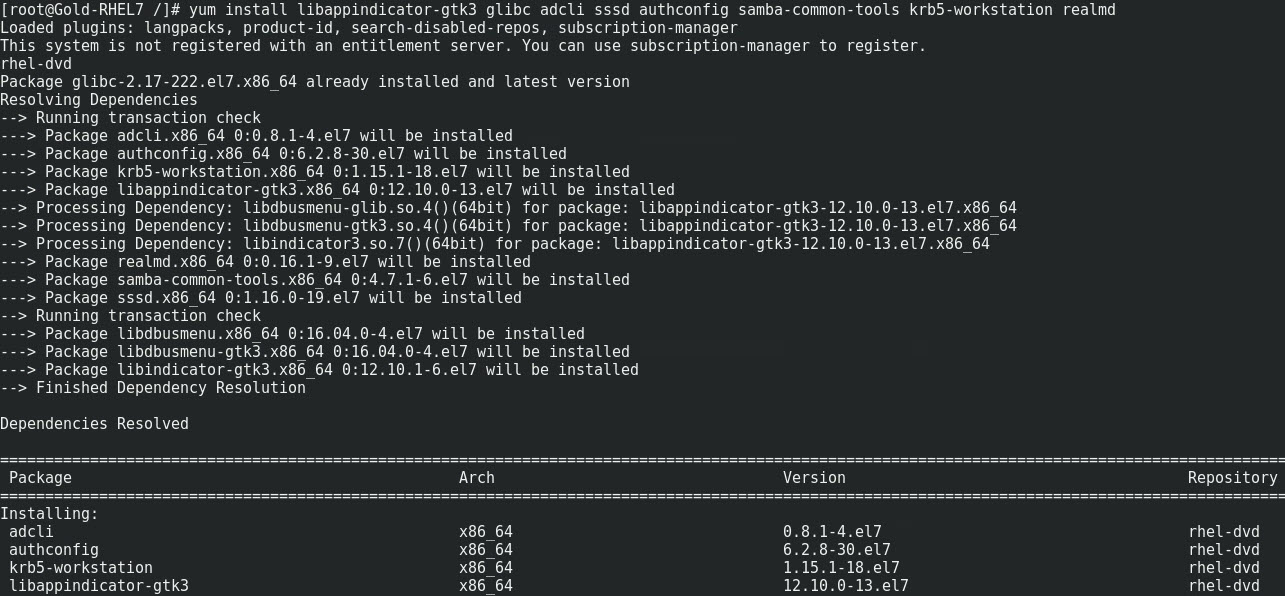
Continue the installation with Yes.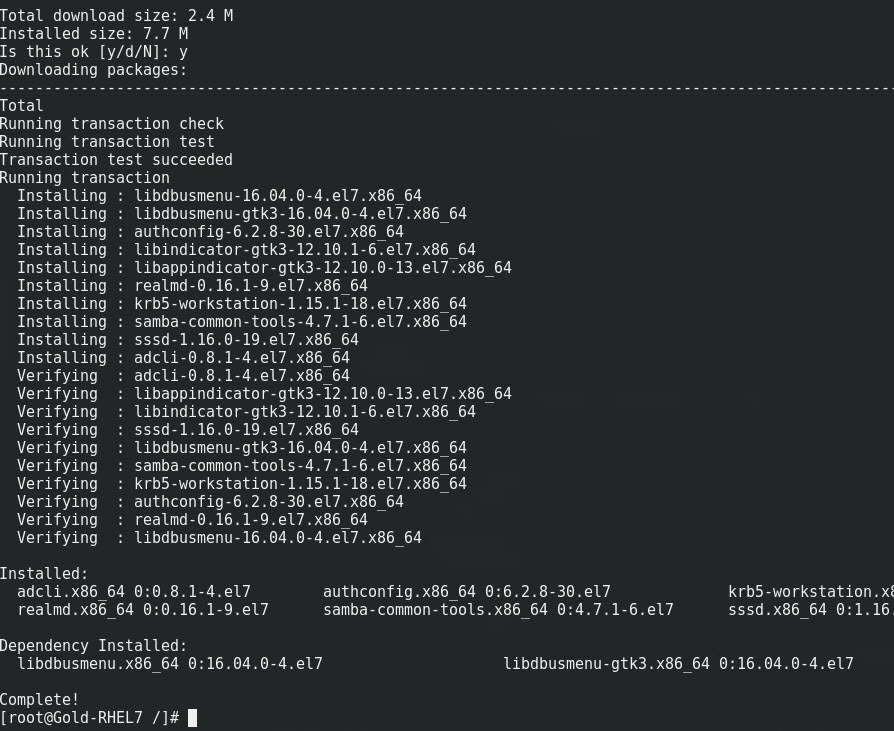
Now that we got our extra services installed, we can detach the repository (DVD).
Go to the repository location.
cd /etc/yum.repos.d
Open the rhel-dvd.repo configuration file with the VI editor.
vi /rhel-dvd.repo![]() Now change the following line back to the default.
Now change the following line back to the default.
enabled=0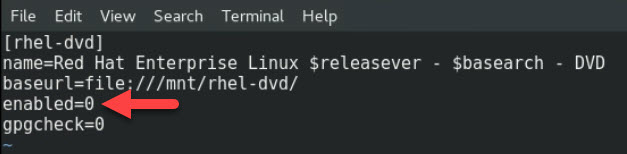 Save and close the configuration file by pressing:
The Escape button followed by “:wq!” to save the file.
From this moment we can detach the ISO from the DVD-drive on the VM.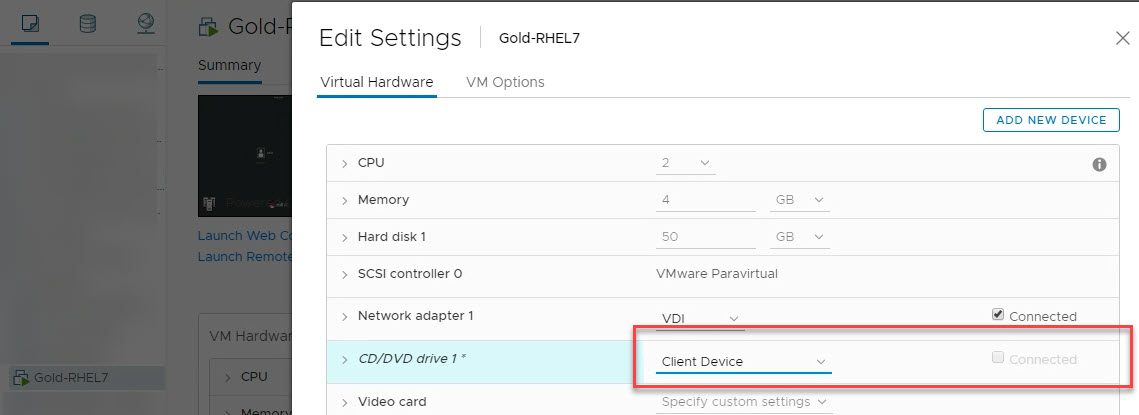
Installation Horizon Agent
Let’s return to the install location:
cd /tmp/_Install
Extract the the Horizon Agent software with the following command:
tar zxvf VMware_horizonagent-linux-x86_64-7.6.0-9857537.tar.gz
The Horizon Agent can be installed with command line options to make it custom.
The following link will explain more about the options:
https://docs.vmware.com/en/VMware-Horizon-7/7.8/linux-desktops-setup/GUID-09A3F97C-47FE-4ABF-B68C-E42AE26632CC.html#GUID-09A3F97C-47FE-4ABF-B68C-E42AE26632CC
Open the extracted folder:
cd VMware_horizonagent-linux-x86_64-7.6.0-9857537
Install the Horizon Agent.
./install_viewagent.sh During the installation there are several choices that can be made.
We have chosen to leave all settings default.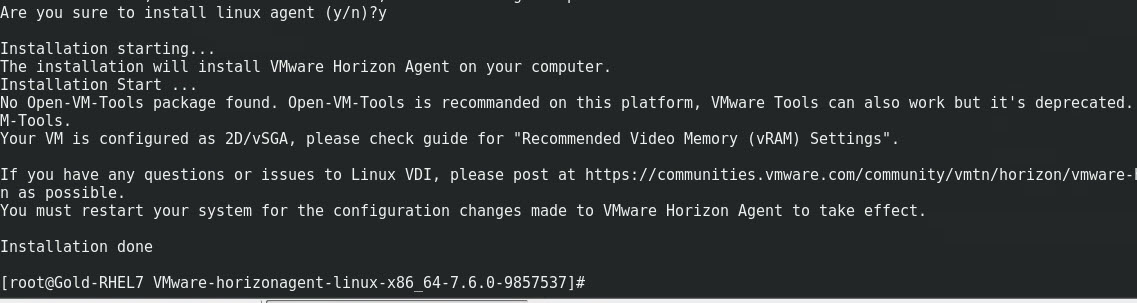 Open the install location of the Horizon Agent.
cd /etc/VMware
Open the Horizon Agent configuration file with the VI editor.
vi viewagent-custom.conf In the VI editor we need to change three settings.
- The User ID format, remove the # and change the line into:
SSOUserFormat=username]@[domain]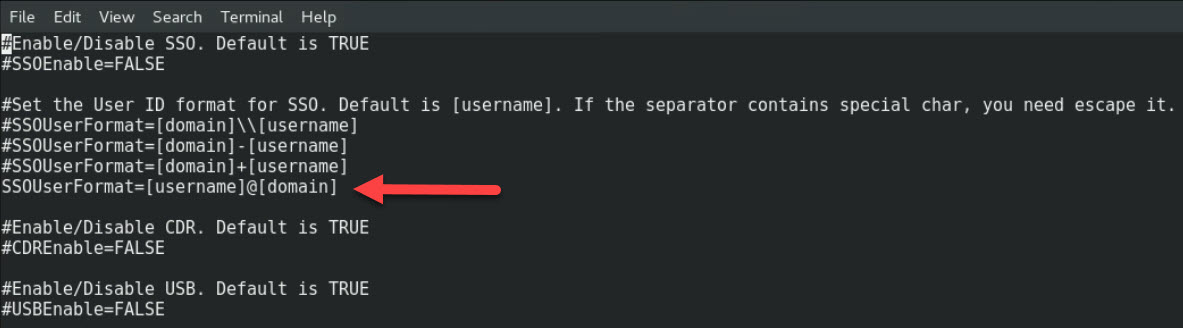
- The KeyboardLayoutSync needs to be disabled.
When we enabled this setting we were not in control of our Keyboard Language. Remove the # and change the line into:
KeyboardLayoutSync=FALSE
- Instant-Clones needs to be enabled. The Instant-Clones can be domain-joined by removing the # and change the line into:
OfflineJoinDomain=none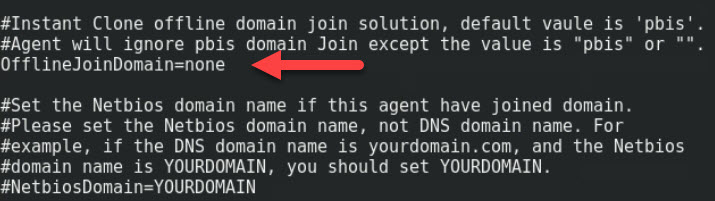
Press the escape button followed by “:wq!”.
The change configuration is now saved.
Domain Join
Join the Template VM to the domain with the following command:
realm join -U username (no domain or UPN)
Fill in the password.
Check If the domain is discovered and configured.
You can use the following commands:
realm list
realm discover -v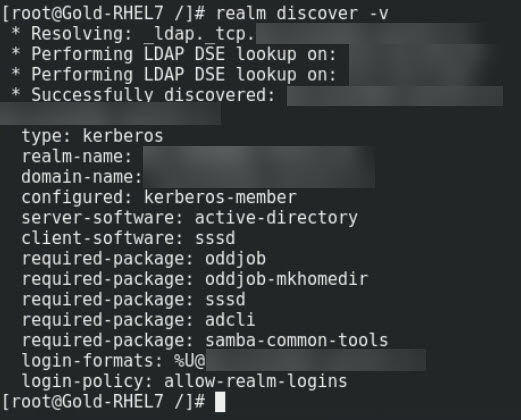
You can also check the krb5.conf and smb.conf file configuration. These files where empty before the domain join. But after the domain join they should be filled with the Active Directory settings. Check this before going to production.
The file is located in the following location and can be opened with the VI editor.
vi /etc/krb5.conf
vi /etc/smb.conf
Now that the configuration of the VM Template is done, we can gracefully shutdown.
Shutdown
Notes
Before you create an snapshot of the VM, fill in the Notes field first.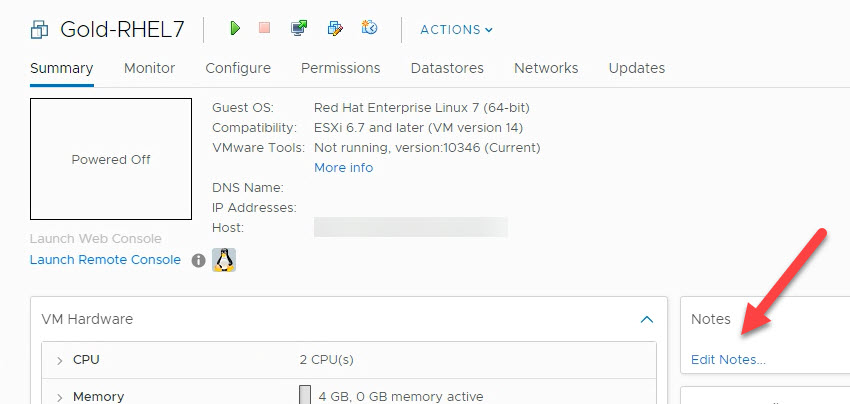
Horizon Instant-Clones
Now the Template VM is finished, you can create an Instant-Clone Pool within Horizon.
Good Luck!
If you got any comments or tips please let me know!